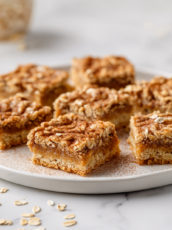
This banana oat bread recipe is born out of those late-night moments when I need something cozy, simple, and a little bit nourishing. I love turning overripe bananas into something sweet and comforting, especially when paired with hearty oats that add texture and a wholesome feel. It’s like a quiet nod to the way good things can come from leftovers and patience.
Baking this bread feels like a small act of kindness to myself. The smell of bananas caramelizing, mingling with warm oats and a hint of cinnamon, pulls me in every time. It’s not fancy, but it’s honest, and sometimes that’s exactly what I crave—the kind of baking that’s practical, unpolished, and deeply satisfying.
This banana oat bread recipe is inspired by my late-night cravings for a comforting bake that uses overripe bananas and hearty oats, turning everyday leftovers into a satisfying treat. It’s a reminder that simplicity and patience in the kitchen can create something unexpectedly nourishing and soulful.
Turning Ripe Bananas into Comfort
- There’s a quiet magic in how overripe bananas turn sweet and jammy, almost like a comfort hug I can bake.
- I love the chaos of mixing oats and bananas—each step feels like a small act of patience, turning leftovers into something warm.
- Baking this bread reminds me that simplicity can be the most honest kind of delicious, especially when the house fills with that caramelized aroma.
- Sharing slices of this bread takes me back to lazy mornings and whispered conversations over a hearty breakfast.
- Every time I bake this, I feel a little proud of turning humble ingredients into something unexpectedly nourishing.
The story behind this recipe
- This recipe came together on a rainy afternoon when I had a bunch of overripe bananas and a restless urge to bake something wholesome without fuss. I wanted a bread that’s dense, moist, and packed with flavor, not overly sweet but satisfying enough to keep in mind for busy mornings. It’s become my go-to for those days when I need a little comfort that’s honest and straightforward.
- Baking it reminds me of my grandma’s kitchen, where simple ingredients turned into something special without much fanfare. It’s that quiet magic of turning ripe fruit and hearty oats into a loaf that feels like a small, nourishing victory—no fancy tricks, just honest baking.
- heading: ‘The story behind this recipe’
Contextual origin, trivia, or history
- This banana oat bread recipe has roots in resourcefulness, dating back to when bakers used overripe fruit to avoid waste.
- Oats, originally a Scottish staple, gained popularity in baking as a hearty, wholesome ingredient during wartime rationing.
- Banana bread became a comfort food in American households during the 1930s, coinciding with the rise of home baking and banana imports.
- The combination of bananas and oats reflects a trend towards healthier baked goods that gained momentum in recent decades.
Ingredient breakdown: key components
- Bananas: Ripe bananas are key—they add natural sweetness and moisture. If yours are more brown than yellow, even better for flavor.
- Oats: Old-fashioned rolled oats give texture and heartiness. If you prefer a subtler chew, try quick oats, but expect a softer crumb.
- Flour: Whole wheat or all-purpose—both work. Whole wheat adds nutty flavor and density, but can be a bit denser if you skip the white flour.
- Sweetener: Honey or maple syrup can replace sugar. They bring a richer, more complex sweetness that pairs beautifully with bananas.
- Add-ins: Nuts, chocolate chips, or dried fruit—go wild. Toast nuts first for extra crunch and flavor that really pops.
- Spices: Cinnamon or nutmeg—just a pinch. They elevate the aroma and add warmth that makes the bread feel cozy.
- Fat: Butter or neutral oil—either works. Butter gives a richer flavor, but oil keeps it moist and light.
Spotlight on key ingredients
Bananas:
- Ripe bananas become soft, jammy, and develop a deep, caramel aroma. They release moisture and sweetness, making the bread moist and flavorful. Slightly overripe bananas are perfect—they mash easily and intensify the banana taste.
- Oats: Old-fashioned rolled oats add a hearty chew and texture. During baking, they soften but still provide a slight bite. Toast oats beforehand for a nutty aroma, which enhances their flavor and adds depth to the bread.
Oats:
- Bananas: Their natural sugars caramelize during baking, creating a fragrant, sweet crust. Their moisture content keeps the loaf tender and dense. Using bananas with darker skins indicates richer flavor and more sweetness.
- They absorb moisture and swell, contributing to a moist crumb. Their slight nuttiness becomes more pronounced as they toast slightly in the oven, adding complexity to each bite.
Notes for ingredient swaps
- Dairy-Free: Swap butter for coconut oil or a neutral vegetable oil. The bread will be slightly lighter and less rich, but still moist.
- Gluten-Free: Use a 1:1 gluten-free flour blend instead of wheat flour. Expect a denser crumb with a subtly different texture.
- Sweetener: Maple syrup or agave nectar can replace honey or sugar. They add a hint of caramel or floral notes, so adjust quantity to taste.
- Oats: Steel-cut or instant oats can be used but will alter texture—steel-cut will be chewier, instant oats softer and finer.
- Bananas: Extra ripe, brown, or even frozen bananas will intensify sweetness and moisture. Less ripe bananas may make the loaf less sweet.
- Add-ins: Mix in chopped nuts, chocolate chips, or dried fruit. Toast nuts beforehand for more aroma and crunch, but skip if allergies are a concern.
- Flavor spices: Nutmeg or cardamom can replace or add to cinnamon. Use sparingly; they can quickly overpower the delicate banana flavor.
Equipment & Tools
- Loaf pan: Holds the batter during baking and shapes the bread.
- Mixing bowls: Separate dry and wet ingredients for easy combining.
- Fork or potato masher: Mash bananas smoothly or with some texture, depending on preference.
- Whisk: Combine wet ingredients thoroughly and introduce air.
- Spatula or spoon: Fold in dry ingredients and smooth batter in the pan.
- Toothpick or cake tester: Test for doneness in the center of the bread.
- Cooling rack: Allow the bread to cool evenly and prevent sogginess.
Step-by-step guide to banana oat bread
- Preheat your oven to 175°C (350°F). Grease a 9×5-inch loaf pan with butter or non-stick spray. Line with parchment if you like for easier removal.
- In a large bowl, mash 3 ripe bananas with a fork until smooth. Feel free to leave some lumps for texture.
- Add 1/3 cup honey or maple syrup, 1/4 cup neutral oil or melted butter, and 2 eggs. Whisk until combined and fragrant—banana-y aroma should be noticeable.
- In a separate bowl, stir together 1 1/2 cups rolled oats, 1 1/2 cups whole wheat or all-purpose flour, 1 teaspoon baking powder, 1/2 teaspoon baking soda, and a pinch of salt. Mix well.
- Gradually fold the dry ingredients into the banana mixture. Do it in stages, just until no streaks of flour remain. Don’t overmix; a few lumps are fine.
- If using nuts, chocolate chips, or dried fruit, fold in now. Keep the batter thick but spreadable—if it feels too stiff, a splash of milk can loosen it up.
- Pour the batter into your prepared loaf pan. Smooth the top with the back of a spoon or spatula. It should be roughly even, with a slight domed center.
- Bake for 45-50 minutes. Check at the 45-minute mark: the top should be golden brown, edges slightly pulled away, and a toothpick inserted in the center should come out with moist crumbs, not wet batter.
- If the top darkens too quickly but the center isn’t done, tent with foil and continue baking. If it looks pale, give it a few more minutes.
- Once baked, turn off the oven and let the bread rest in the pan for 10 minutes. Then, transfer to a wire rack to cool completely—this helps set the crumb and prevents sogginess.
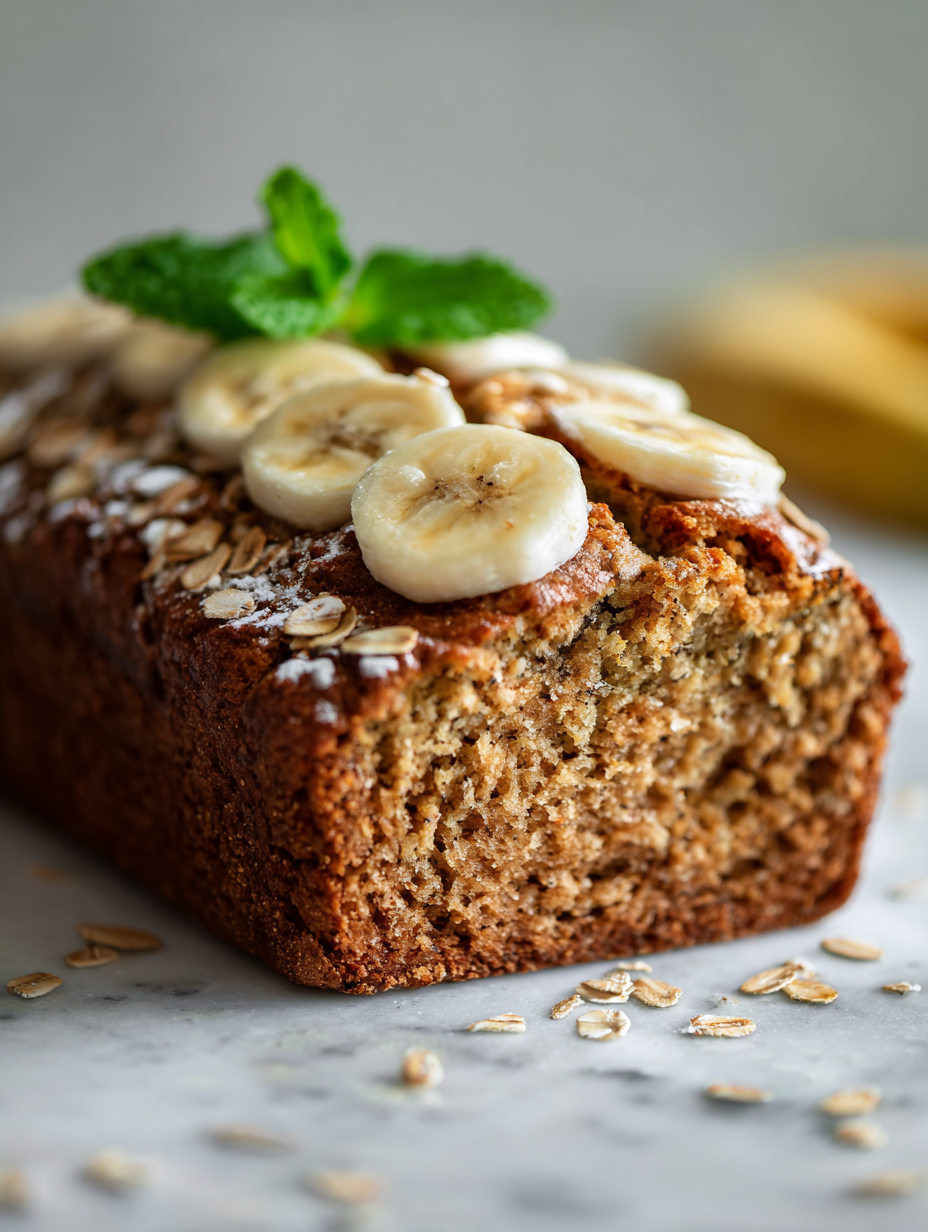
Let the bread cool in the pan for 10 minutes, then transfer to a wire rack. Slice once fully cooled; it firms up and slices more neatly. Serve at room temperature or slightly warmed, with butter or just plain.
How to Know It’s Done
- Golden brown crust, fragrant banana aroma, and a slight jiggle in the center for a moist crumb.
- Toothpick inserted in the middle comes out with moist crumbs, not wet batter.
- Edges slightly pull away from the pan, indicating it’s baked through.
Banana Oat Bread
Ingredients
Equipment
Method
- Preheat your oven to 175°C (350°F) and grease your loaf pan with butter or non-stick spray, then set aside.
- Peel the bananas and mash them thoroughly in a large bowl with a fork or potato masher until smooth with a few small lumps for texture.
- Add the honey or maple syrup, oil or melted butter, and eggs to the mashed bananas. Whisk everything together until the mixture is fragrant and smooth, about 1-2 minutes.
- In a separate bowl, combine the rolled oats, flour, baking powder, baking soda, and a pinch of salt. Mix well to evenly distribute the dry ingredients.
- Gradually fold the dry mixture into the wet banana mixture using a spatula or spoon, just until combined. Be careful not to overmix; it’s okay if a few lumps remain.
- Pour the batter into your prepared loaf pan, smoothing the top with the back of a spatula for an even surface.
- Bake in the oven for 45-50 minutes, until the top turns a golden brown and a toothpick inserted into the center comes out moist with crumbs, not wet batter.
- Once baked, remove the bread from the oven and let it cool in the pan for 10 minutes. Then transfer it to a wire rack to cool completely, which helps set the crumb and prevents sogginess.
- Slice the bread once cooled, and enjoy it plain or with your favorite spread. The loaf should be moist, dense, and fragrant with caramelized banana and oats.
Pro tips for perfect banana bread
- Use ripe bananas: Ripe bananas are soft, jammy, and full of flavor, making your bread sweet and moist.
- Toast your oats: Lightly toasting oats beforehand boosts their nutty aroma and adds depth to the texture.
- Mix gently: Fold dry ingredients into the wet just until combined—overmixing can make the bread dense.
- Check for doneness: A golden crust, a slight jiggle, and a toothpick with moist crumbs mean it’s ready.
- Adjust baking time: If the crust darkens too quickly, tent with foil; if too pale, bake a few more minutes.
- Cool properly: Let the bread rest in the pan for 10 minutes, then cool on a wire rack to prevent sogginess.
- Add-ins last: Fold in nuts or chocolate chips at the end for bursts of flavor and crunch.
Common mistakes and how to fix them
- FORGOT to check oven temperature → Use an oven thermometer for accuracy.
- DUMPED in too much flour → Measure carefully to avoid a dense, dry loaf.
- OVER-TORCHED the crust → Cover loosely with foil if browning too fast.
- UNDER-MIXED the batter → Mix until ingredients are just combined, don’t overdo it.
Quick fixes and pantry swaps
- If bananas are too green, splash a little lemon juice to speed ripening.
- When batter feels too stiff, open pantry swap—add a splash of milk for softness.
- Splash a few drops of vanilla if you want a fragrant boost in flavor.
- Patch a cracked loaf by wrapping it in a towel immediately after baking—keeps moisture in.
- Shield a darkened crust by tenting with foil if oven hot spots cause uneven browning.
Prep, store, and reheat tips
- Prep the banana mash and measure dry ingredients ahead of time; store separately in airtight containers in the fridge for up to 24 hours, keeping the bananas from browning further.
- The baked bread keeps well wrapped in plastic or foil at room temperature for up to 2 days, developing a slightly softer crumb over time.
- For longer storage, freeze slices wrapped individually; they maintain good texture for up to 2 months. Thaw at room temperature or warm gently in the oven until fragrant.
- Reheat slices in a 150°C (300°F) oven for 8-10 minutes until warmed through. Expect an aroma of toasted oats and caramelized banana, with a moist, tender bite.
Top questions about banana oat bread
1. Should I use very ripe bananas?
Use bananas that are fully brown and soft—these release the most flavor and moisture. They smell sweet and jammy, making your bread extra rich.
2. Can I use bananas that aren’t fully ripe?
Yes, the riper, the better. Slightly overripe bananas give a deeper, caramelized flavor that makes the bread taste special.
3. How do I know when it’s baked enough?
Keep an eye on the oven; the bread is done when it’s golden on top, a toothpick comes out with moist crumbs, and the edges pull away slightly.
4. What if the crust browns too quickly?
If the crust darkens too fast, tent the loaf with foil. If it’s too pale, bake a few more minutes until it’s golden and fragrant.
5. How should I store leftover bread?
Wrap cooled bread tightly in plastic or foil. It will stay fresh for 2 days at room temp, or freeze slices for up to 2 months.
6. How do I reheat the bread?
Reheat slices in a 150°C (300°F) oven for 8–10 minutes. Expect the aroma of toasted oats and caramelized banana, with a moist crumb.
7. Can I use different sweeteners?
You can swap honey or maple syrup for sugar—these add richer, more complex sweetness, but reduce slightly to prevent excess moisture.
8. Can I substitute different oats?
Use rolled oats for texture. Quick oats make a softer crumb, but give less chew. Toast oats beforehand for extra flavor.
9. Can I make it dairy-free?
For a dairy-free version, replace butter with coconut oil or neutral oil. The loaf stays moist but has a slightly different flavor.
10. What if my batter is too thick?
If the batter feels too stiff, add a splash of milk or water to loosen it up before baking. It helps with even rising and texture.
Baking this banana oat bread feels like a small, honest act of kindness—something that’s always there when I need a little comfort. The smell of caramelized bananas and toasted oats lingering in the air is a reminder that simple ingredients can bring warmth and satisfaction.
It’s not fancy or perfect, but it’s real, nourishing, and deeply practical—just like the days when I turn leftovers into something that feels like a quiet victory. Every slice is a reminder that good baking doesn’t have to be complicated to be memorable.

Hi, I’m Noah Bennett, the creator behind Breathing In Flavors. For me, cooking begins with a breath. Before the first bite, before the plating, before the garnish, there is that quiet moment when steam rises and you inhale. That is where flavor truly begins. Breathing In Flavors is my space to slow down, appreciate ingredients, and cook with awareness. I am so glad you’re here.
 The creator behind Breathing In Flavors.
For me, cooking begins with a breath. Before the first bite, before the plating, before the garnish, there is that quiet moment when steam rises and you inhale. That is where flavor truly begins.
Breathing In Flavors is my space to slow down, appreciate ingredients, and cook with awareness. I am so glad you’re here.
The creator behind Breathing In Flavors.
For me, cooking begins with a breath. Before the first bite, before the plating, before the garnish, there is that quiet moment when steam rises and you inhale. That is where flavor truly begins.
Breathing In Flavors is my space to slow down, appreciate ingredients, and cook with awareness. I am so glad you’re here.