This yogurt cake is the kind of dessert that feels like a little secret—something you can whip up in no time when a sweet craving hits. It’s that perfect balance of tangy and sweet, all tender and moist, with almost no fuss involved. I love how pantry staples like yogurt, flour, and sugar come together to create something surprisingly special, even on the busiest nights.
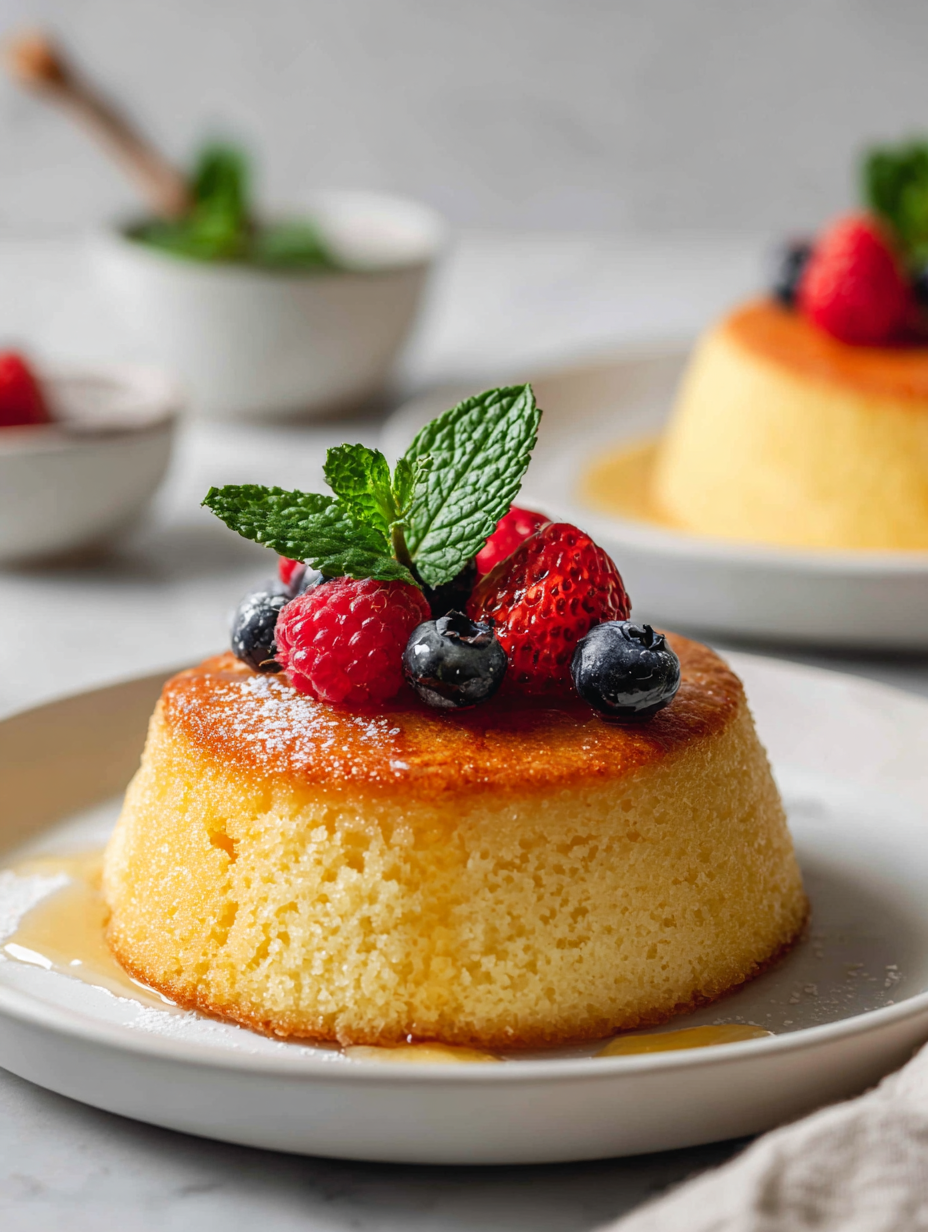
There’s a quiet joy in knowing I can turn basic ingredients into a comforting treat without planning ahead. It’s versatile enough to serve plain or dressed up with fruit, honey, or a dusting of powdered sugar. Somehow, this cake makes ordinary moments feel just a little more thoughtful, a little more indulgent, even when time is tight.
Focusing on how this yogurt cake can be a spontaneous, no-fuss dessert that brightens even the busiest weeknights, using pantry staples and minimal prep. It’s about finding comfort and a touch of brightness in simple ingredients, turning everyday moments into something a little more special without the fuss.
Spontaneous Baking Joys
- Baking this cake always surprises me how easily pantry staples turn into something special.
- There’s a nostalgic comfort in the tangy, moist crumb that reminds me of childhood treats.
- I love how this simple recipe can be dressed up or kept plain, fitting any mood or occasion.
- It’s a tiny victory to turn everyday ingredients into a dessert that feels both thoughtful and straightforward.
- This cake has become my go-to for last-minute cravings, offering sweet relief with minimal fuss.
The story behind this recipe
- This yogurt cake was born out of a lazy Sunday craving and a nearly empty fridge. I wanted something quick, tangy, and comforting—no fancy ingredients, just what was on hand. The first time I made it, I was surprised how the tangy yogurt kept the crumb moist and tender without much fuss.
- Over the years, it’s become a staple in my kitchen, especially when I need a reliable, no-penalty dessert. It’s the kind of recipe that feels like a quiet secret, waiting to be shared with friends or enjoyed alone with a cup of tea. There’s a little joy in how simple ingredients can turn into something unexpectedly special.
- heading: “The story behind this recipe”
Contextual origin, trivia, or history
- This yogurt cake hails from France, where it’s called ‘Gâteau au Yaourt,’ a humble, family favorite recipe passed down through generations.
- It’s believed to have originated as a practical way for home cooks to measure ingredients using yogurt as a natural measuring cup.
- Historically, yogurt cakes like this gained popularity in the mid-20th century as affordable, simple desserts during post-war rationing.
- In many cultures, yogurt-based baked goods symbolize nourishment and comfort, often served during festive family gatherings.
- Quirky fact: In some regions, this cake is called ‘Tangy Treasure’ because of its distinctive, slightly tart flavor from the yogurt.
Ingredient breakdown: key components
- Whole milk yogurt: I use plain, full-fat yogurt for that rich, creamy tang that keeps the cake moist. Feel free to swap with Greek yogurt if you want a denser crumb; just reduce the liquid slightly.
- Granulated sugar: I prefer coarse sugar for a slight crunch, but superfine works too if you want a smoother top. Cutting back a bit can slightly tame the sweetness without losing the balance.
- Flour: All-purpose is my go-to—no fuss, reliable. For a slightly lighter texture, you might try cake flour, but keep the measurement consistent to avoid a dense crumb.
- Eggs: Large eggs are best—they help structure and moisture. If you only have smaller eggs, add an extra one to keep the batter balanced.
- Oil: Neutral vegetable oil keeps the cake tender. Olive oil adds a fruity note if you’re feeling adventurous, but avoid anything too strong or it might overpower the yogurt’s tang.
- Baking powder: Just enough to give it a gentle rise. Make sure it’s fresh—no one wants a flat cake that’s more muffin than tender crumb.
- Vanilla extract: A splash brings warmth and depth. If you’re out, a pinch of almond extract can add a lovely, nutty aroma.
Spotlight on key ingredients
Whole milk yogurt:
- I use plain, full-fat yogurt for that rich, creamy tang that keeps the cake moist. Feel free to swap with Greek yogurt if you want a denser crumb; just reduce the liquid slightly.
- Granulated sugar: I prefer coarse sugar for a slight crunch, but superfine works too if you want a smoother top. Cutting back a bit can slightly tame the sweetness without losing the balance.
- Flour: All-purpose is my go-to—no fuss, reliable. For a slightly lighter texture, you might try cake flour, but keep the measurement consistent to avoid a dense crumb.
Baking powder:
- Eggs: Large eggs are best—they help structure and moisture. If you only have smaller eggs, add an extra one to keep the batter balanced.
- Oil: Neutral vegetable oil keeps the cake tender. Olive oil adds a fruity note if you’re feeling adventurous, but avoid anything too strong or it might overpower the yogurt’s tang.
- Just enough to give it a gentle rise. Make sure it’s fresh—no one wants a flat cake that’s more muffin than tender crumb.
Notes for ingredient swaps
- Dairy-Free: Substitute coconut yogurt for regular yogurt. It adds a subtle coconut aroma and slightly richer texture, but may make the cake more moist and dense.
- Sugar Alternatives: Use honey or maple syrup instead of sugar. Reduce the liquid slightly to compensate, and expect a more caramelized flavor.
- Flour Variations: Swap all-purpose flour with almond flour for a nuttier taste and denser crumb, or use gluten-free flour blend for a suitable gluten-free version.
- Egg-Free: Replace eggs with flaxseed meal (1 tbsp flaxseed + 3 tbsp water per egg). It provides binding but might slightly alter texture and rise.
- Oil Choices: Swap neutral oil with melted butter for richer flavor, or use applesauce for lower fat and a bit more moisture.
- Baking Powder: If out of baking powder, use baking soda with a bit of vinegar (1/4 tsp baking soda + 1/2 tsp vinegar per teaspoon of baking powder).
- Flavor Boosts: Add lemon zest or vanilla extract for extra brightness or warmth, adjusting the amount to suit your taste.
Equipment & Tools
- Cake pan: Holds the batter during baking and shapes the cake.
- Parchment paper: Prevents sticking and makes removal easier.
- Mixing bowls: Combines ingredients smoothly and efficiently.
- Whisk: Incorporates air and blends wet ingredients.
- Spatula: Folds dry ingredients and smooths the batter.
- Cooling rack: Allows air to circulate and cool the cake evenly.
Guide to Yogurt Cake Preparation
- Gather your equipment: a 20cm (8-inch) round cake pan, parchment paper, mixing bowls, whisk, spatula, and a cooling rack.
- Preheat your oven to 180°C (350°F). Line the cake pan with parchment, leaving some overhang for easy removal.
- In a large bowl, whisk together 1 cup (240g) plain yogurt, 1 cup (200g) sugar, and 3 large eggs until smooth and slightly frothy, about 2 minutes.
- Add ½ cup (120ml) neutral oil (like sunflower or vegetable), and gently whisk until fully incorporated. The mixture should be shiny and smooth.
- Sift in 1¾ cups (220g) all-purpose flour and 1 tsp baking powder. Fold gently with a spatula until just combined—don’t overmix, you want a tender crumb.
- Pour the batter into the prepared pan. Smooth the top with the spatula and tap the pan lightly on the counter to settle the batter.
- Bake for about 30–35 minutes. The cake is done when the top is golden, a toothpick inserted in the center comes out clean, and it feels springy to the touch.
- If the top starts to darken too quickly before the middle is set, loosely cover with foil and continue baking. If you notice cracks, don’t worry; it’s part of its charm.
- Once baked, remove from oven and let the cake cool in the pan for 10 minutes. Then, transfer to a wire rack and cool completely before slicing.
- Rest for at least 15 minutes after cooling to allow flavors to settle. Serve plain or with a dusting of powdered sugar or fresh fruit.
Let the cake rest in the pan for 10 minutes, then transfer to a wire rack. Cool completely before slicing. Serve as is or with toppings of your choice.
How to Know It’s Done
- The cake surface is golden and slightly domed.
- A toothpick inserted in the center comes out clean.
- The cake feels springy and lightly pulls away from the sides of the pan.
Simple Yogurt Cake
Ingredients
Equipment
Method
- Preheat your oven to 180°C (350°F). Line a 20cm (8-inch) round cake pan with parchment paper for easy removal.
- In a large mixing bowl, whisk together the yogurt, sugar, and eggs until the mixture is smooth and slightly frothy, about 2 minutes. This creates a tangy, creamy base.
- Pour in the vegetable oil and gently whisk until fully incorporated, resulting in a shiny, smooth batter.
- Sift the flour and baking powder into the wet mixture to prevent lumps. Fold gently with a spatula until just combined; do not overmix to keep the cake tender.
- Add the vanilla extract and give the batter a final gentle fold to evenly distribute the flavor.
- Pour the batter into the prepared pan, smoothing the top with a spatula. Lightly tap the pan on the counter to settle the batter and release any air bubbles.
- Bake in the preheated oven for 30–35 minutes, until the top is golden, the edges pull slightly from the pan, and a toothpick inserted in the center comes out clean.
- Remove the cake from the oven and let it cool in the pan for about 10 minutes. Then, transfer it to a cooling rack and allow it to cool completely, which helps set the crumb and prevents cracking.
- Once cooled, slice the cake and serve plain or dusted with powdered sugar, or topped with fresh fruit for extra brightness.
Notes
Pro tips for perfect yogurt cake
- Room temperature ingredients: Ensure your eggs and yogurt are at room temp for a smoother, more homogeneous batter.
- Gentle folding: When adding flour, fold gently to keep the batter airy—overmixing can make the cake dense and heavy.
- Check oven accuracy: Use an oven thermometer; home ovens can be off by 10–20°C, affecting baking time and rise.
- Don’t overbake: Remove the cake when it’s just golden and a toothpick in the center comes out with moist crumbs, not wet batter.
- Cooling patience: Let the cake cool in the pan for 10 minutes before transferring to a rack; this prevents cracks and crumbling.
- Moisture test: Gently press the top; it should bounce back slightly—overbaking dries it out, underbaking leaves it too wet.
- Flavor enhancement: A teaspoon of vanilla or lemon zest added to the batter elevates the tangy yogurt flavor beautifully.
Common mistakes and how to fix them
- FORGOT to check oven temperature → Use an oven thermometer for accuracy.
- DUMPED in all ingredients at once → Mix dry and wet separately before combining.
- OVER-TORCHED the top → Cover with foil if browning too fast.
- MISSED the cooling step → Cool completely to set the texture and avoid crumbling.
Quick Fixes and Pantry Swaps
- When batter is too thick, splash in a little more yogurt to loosen it.
- If cake cracks, patch with a dollop of whipped cream or fruit preserves.
- Splash lemon juice over the top to brighten flavors when the cake is a bit dull.
- Patch dry spots with a swipe of softened butter or a drizzle of honey.
- Shield the cake with foil if it starts to over-brown before baking through.
Prep, store, and reheat tips
- Prepare the batter up to a day in advance; keep it covered in the fridge. The flavors meld overnight, and the batter becomes even easier to pour.
- Store cooled cake lightly wrapped in plastic at room temperature for up to 2 days; refrigerate for longer storage, which can dry it out slightly but keeps it fresh.
- This cake keeps well for 3–4 days. The flavor slightly deepens, and the crumb stays moist if stored properly. Reheat slices for 10 seconds in the microwave until warm and fragrant—watch for steam, not sogginess.
- For longer storage, freeze slices wrapped tightly in plastic and foil for up to 1 month. Thaw at room temperature and rewarm gently to revive softness and aroma.
Top questions about yogurt cake
1. How do I know when the yogurt cake is done?
Look for a cake that feels springy and pulls away slightly from the sides of the pan. The top should be golden and a toothpick inserted in the center comes out clean.
2. Can I use Greek yogurt instead of regular yogurt?
Use full-fat plain yogurt for the best moistness and tang. Greek yogurt will make it denser, so reduce the liquid slightly if you swap.
3. Is there a dairy-free option for this cake?
Yes, you can substitute coconut yogurt for a dairy-free version. It adds a subtle coconut aroma and makes the cake slightly richer and moist.
4. My batter is too thick or too runny, what now?
If the batter feels too thick, add a splash more yogurt. If it’s too runny, fold in a bit more flour carefully.
5. How should I store leftovers?
Store the cooled cake in an airtight container at room temperature for 1-2 days or in the fridge for up to 4 days. Reheat slices briefly in the microwave for softness.
6. My cake cracked on top, what can I do?
If your cake cracks, don’t worry. You can patch it with a spoonful of whipped cream or fresh fruit preserves for a charming look and added flavor.
7. How important is oven temperature?
Always preheat your oven to 180°C (350°F). Use an oven thermometer if possible, as home ovens can vary in actual temperature.
8. How do I avoid overmixing?
Gently fold the dry ingredients into the wet to keep the batter airy. Overmixing can make the cake dense and heavy.
9. Can I add flavorings to the batter?
To add extra flavor, stir in lemon zest, vanilla, or a pinch of cinnamon before baking. It enhances the tangy yogurt and adds depth.
10. Can I prepare the batter in advance?
Yes, the batter can be prepared a day ahead. Cover tightly and refrigerate. The flavors will meld, and it’s ready to bake when you need it.
Baking this yogurt cake always feels like a small victory—simple ingredients, honest flavors, and that moist crumb. It’s a reminder that comfort can come from the humblest of staples, especially when you need a quick fix for a sweet craving.
In a world that’s constantly rushing, this cake offers a little moment of calm and satisfaction. It’s no-fuss, no-mess, and just the right touch of tang and sweetness—perfect for when you want something homemade without the fuss.

Hi, I’m Noah Bennett, the creator behind Breathing In Flavors. For me, cooking begins with a breath. Before the first bite, before the plating, before the garnish, there is that quiet moment when steam rises and you inhale. That is where flavor truly begins. Breathing In Flavors is my space to slow down, appreciate ingredients, and cook with awareness. I am so glad you’re here.
 The creator behind Breathing In Flavors.
For me, cooking begins with a breath. Before the first bite, before the plating, before the garnish, there is that quiet moment when steam rises and you inhale. That is where flavor truly begins.
Breathing In Flavors is my space to slow down, appreciate ingredients, and cook with awareness. I am so glad you’re here.
The creator behind Breathing In Flavors.
For me, cooking begins with a breath. Before the first bite, before the plating, before the garnish, there is that quiet moment when steam rises and you inhale. That is where flavor truly begins.
Breathing In Flavors is my space to slow down, appreciate ingredients, and cook with awareness. I am so glad you’re here.